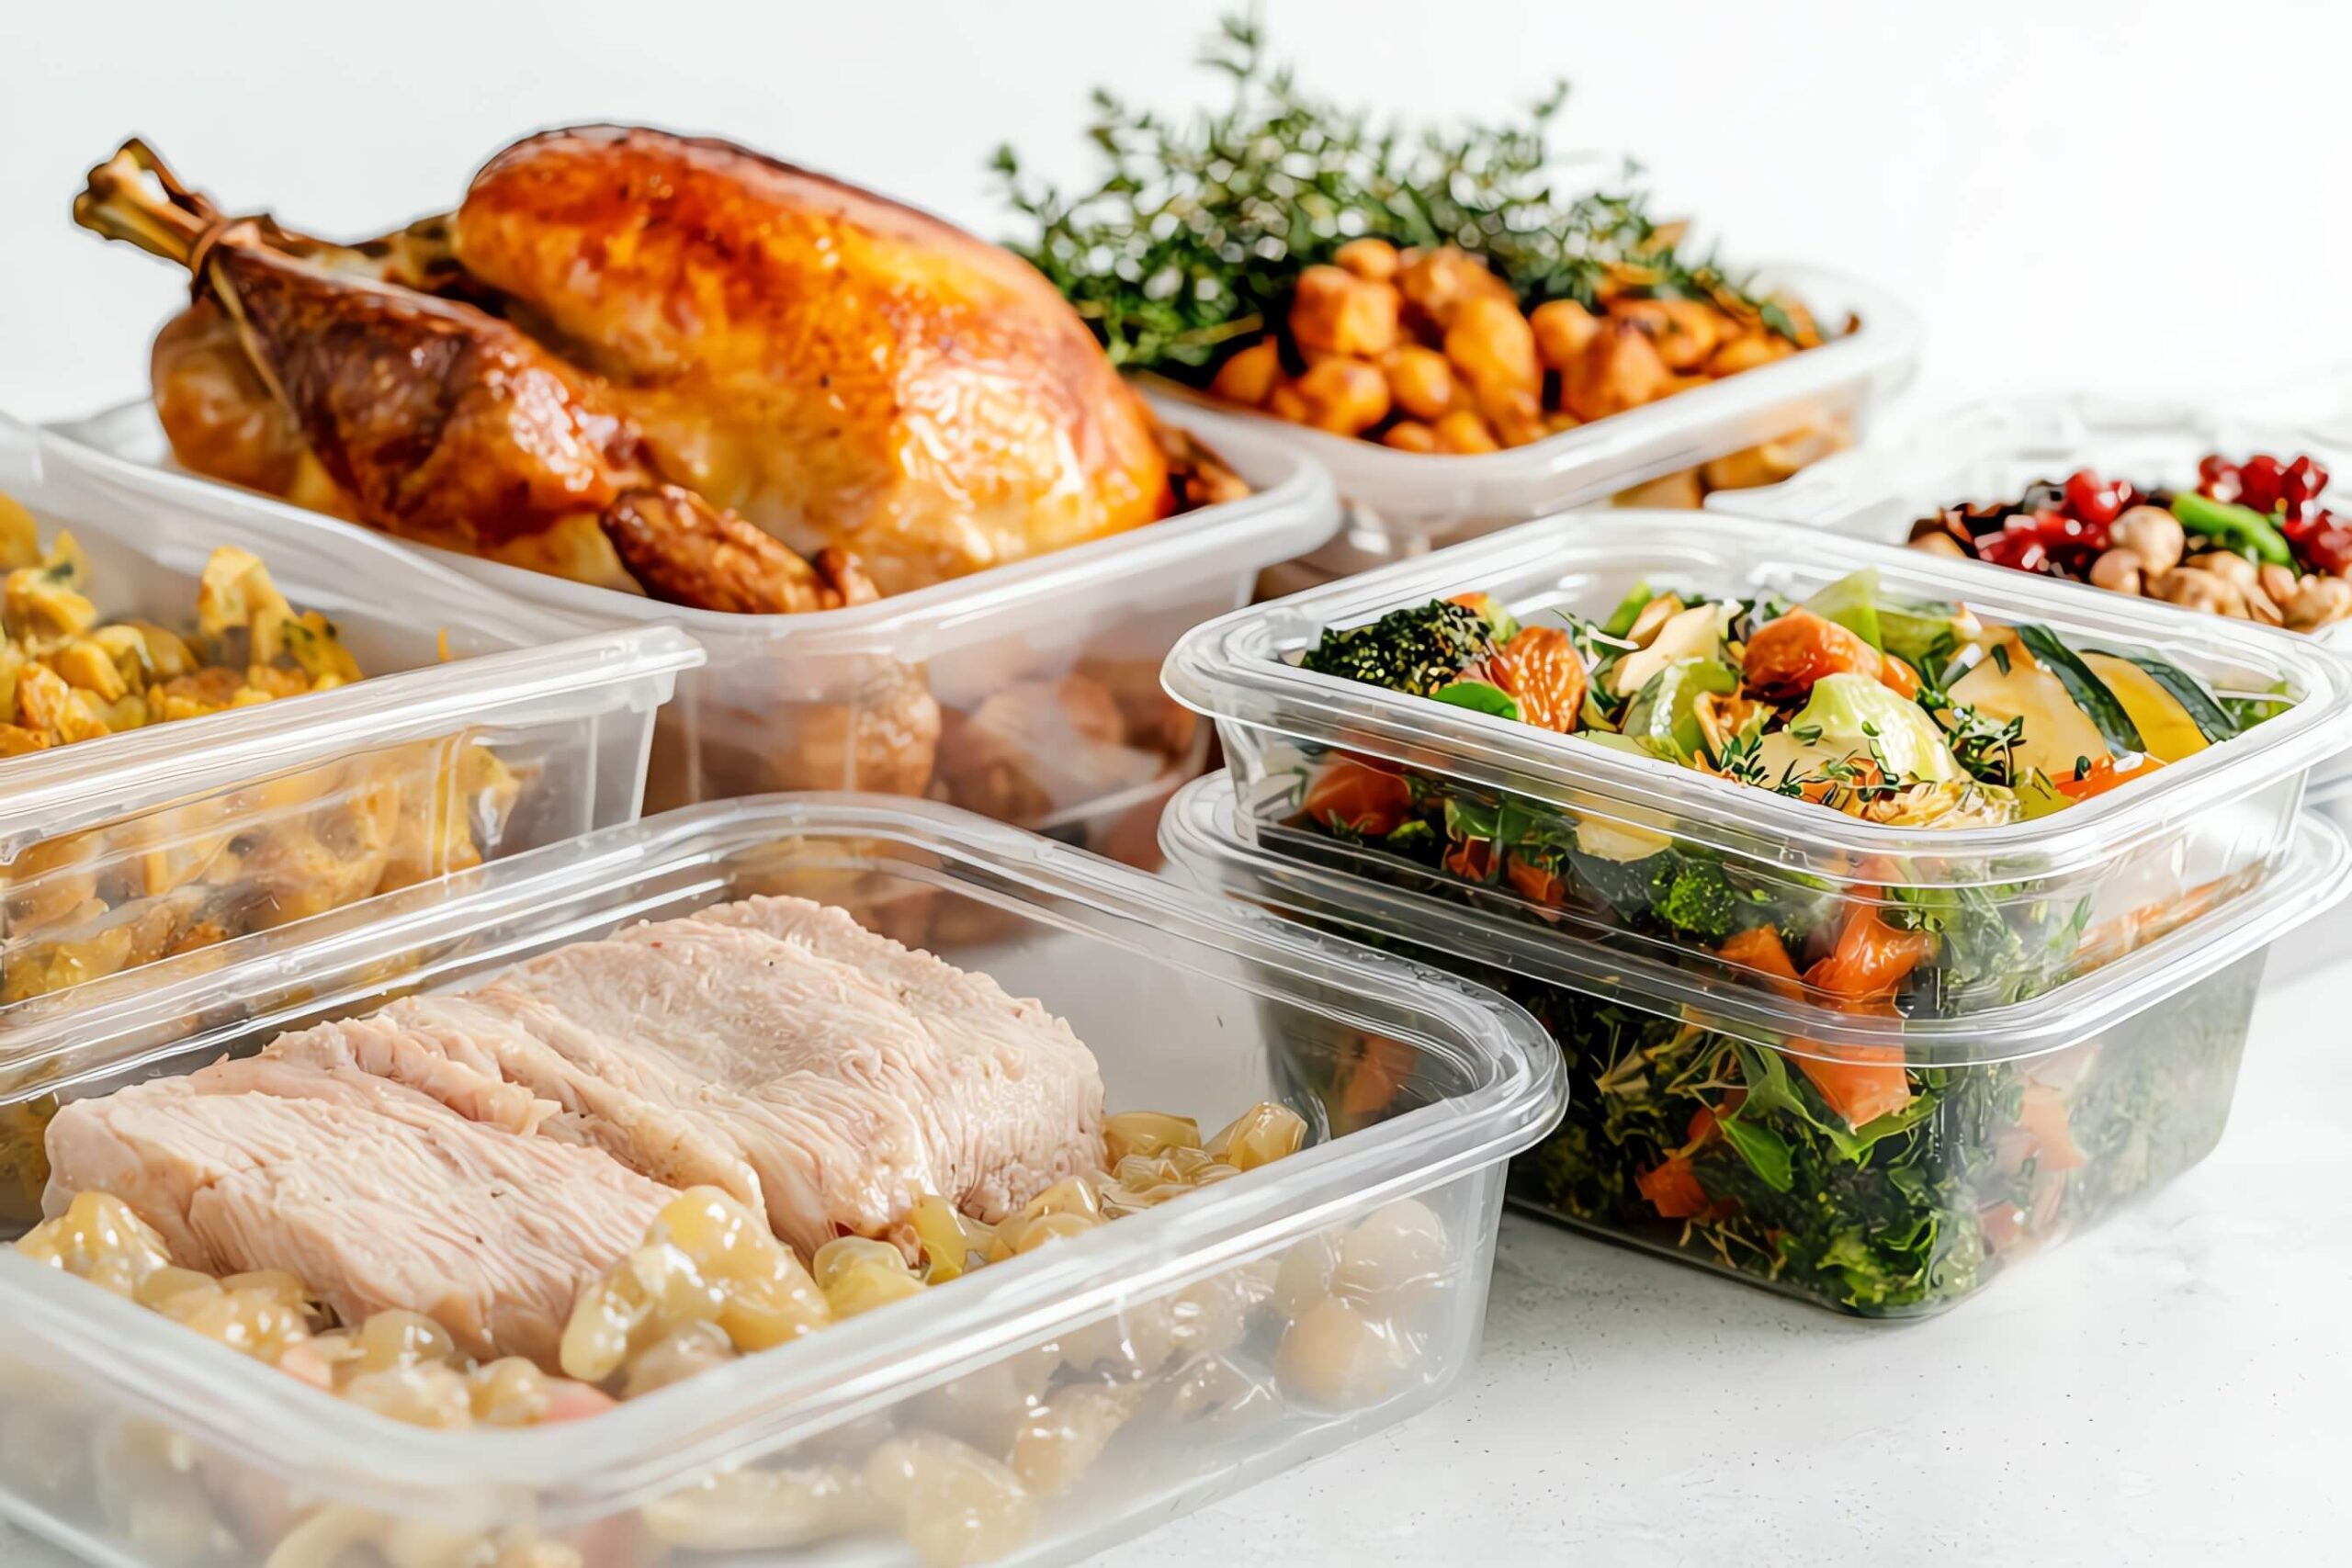
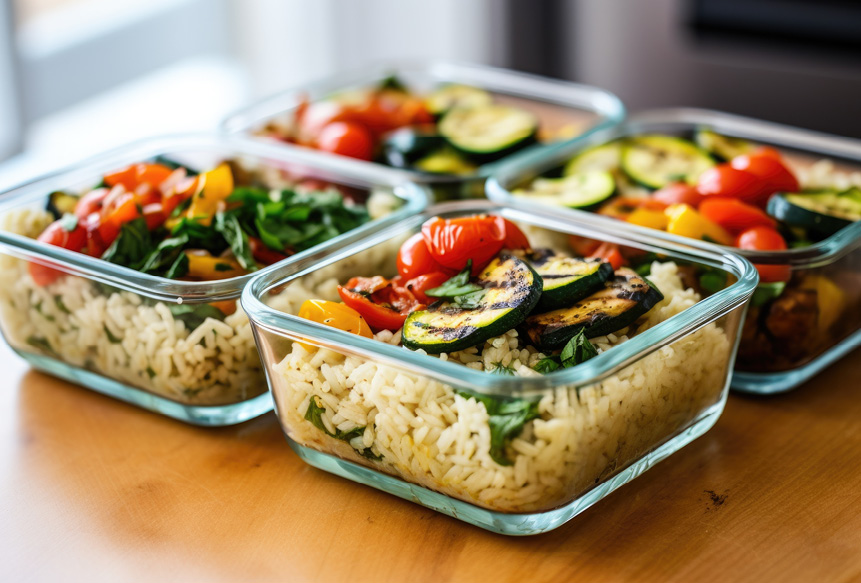
Click on a link below and be transported to food rescue, your way!
Refrigerating
Refrigerating
Freezing
Freezing
Canning
Canning
Portioning
Portioning
Storing
Storing
Dehydrating
Dehydrating
Sobeys Inc. is a family nurturing families and is committed to nourishing communities and helping feed neighbourhoods from coast to coast.
A total of 58% of food produced in Canada is lost or wasted every year. To combat this, we’ve introduced the 4th “R”: Reduce, Reuse, Recycle and Rescue.
Did you know that you can repurpose the brine from a pickle jar to create a tasty soup? Or that changing up your refrigerator organization can help your milk stay fresh for longer? We’re sharing tips and tricks just like these to support Waste Reduction Week in Canada’s 20th anniversary!
Every October, Canadian farmers, businesses, transport teams, grocers, and more come together to celebrate our achievements throughout the year for reducing the amount of trash going to landfill. And, with 56.6 million tonnes of greenhouse gas (GHG) emissions released because of food waste, it’s a vital step forward we take in unison toward a greener future.
As well as this, there’s 32% (around 11.2 million tonnes) of food lost or wasted that could have been redirected to communities across Canada experiencing food insecurity each day. Let’s rescue food and do OurPart™ for future generations.
You can rescue food waste at home by following one of our 6 tips below!
Rescue Food by Refrigerating It
Storing your fresh groceries in the fridge can often become a game of “stack ’em where you can!”. To ensure the even distribution of cooling in your refrigerator, learn how to optimize the placement of groceries in your fridge (from vegetables to meat) to make each ingredient last that little bit longer.
For example, while the fridge door might still be a part of the fridge, it doesn’t keep items as cool as other sections like the bottom shelf! So, let’s go through the sections of your refrigerator and find out where’s best for what produce;
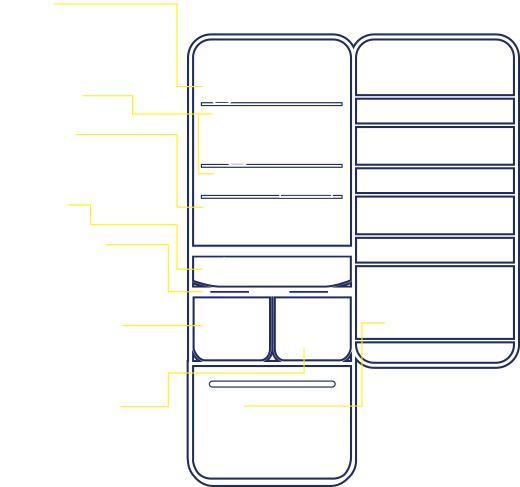
The Top Shelf
When it comes to food rescue and the top shelf, it’s all about looking back at school physics classes where we learned that heat rises. And, this applies to the fridge, too. Meaning the top shelf is going to be the least cool of all the shelves, and only specific foods belong here.
Foods for the top shelf:
- Leftovers
- Ready meals
- Snacks
- Cooked meats
The Middle Shelves
The middle shelves, whether you have just one, three, or more should be given the special role of keeping all your dairy cool. While they’re still not the coolest of shelves, they are much better at keeping your produce cool than the door or the top shelf.
Foods for the middle shelves:
- Milk
- Eggs
- Cheese
- Yogurt
- Bread
- Butter
The Bottom Shelf
The bottom shelf is the coldest open shelf you have. Meaning, it’s the right place to store all your meats. But that’s not the only reason it’s the perfect place; meat can contaminate below produce in your fridge, so it’s best to keep it low to prevent any cross-contamination!
Foods for the bottom shelf:
- Poultry
- Shellfish
- Seafood
- Red meat
The Drawers
Your fridge may have one large drawer, two drawers, three, or even more. You may even have a fridge with an adjustable lever that allows you to alter the humidity of some drawers to make it even better for rescuing food you forgot to put on the menu yesterday.
Foods for the drawers:
- Vegetables
- Fruits
- Salad
The Door
While the top shelf is the least cool shelf in the fridge, the door is the warmest part as a whole. This is because it is the farthest away from the cooling source and is always first to come into contact with the warmer air outside of the fridge, meaning only specific grocery items have their home here.
Foods for the door:
- Water
- Soda
- Juice
- Chocolate
- Sauces
- Jams
- Alcohol
Fridge FAQs
What is the best temperature for the fridge?
The best temperature is 4°C (39.2°F) or lower. Your fridge should be kept cool so it can slow the maturing process of food and keep them fresh for longer so there’s less food waste.
Can you control the ripening process?
Yes, to a degree! Fresh ingredients like apples and bananas produce ethylene gas. This gas speeds up ripening so take other ingredients away from them.
What is a low humidity fridge drawer used for?
A low humidity drawer sits under the shelves and is best used for fresh produce that can quickly break down such as apples, pears, and other acidic fruits. But a tip is to always keep it clean and dry!
What is a high humidity fridge drawer used for?
A high humidity drawer helps to keep greens and water-based veggies in ship shape. For example, lettuce, cucumber, carrots, spinach, and more. But keep this drawer clean and dry!
How full should the fridge be and why?
A fridge should never be full to the brim with food. It should be a maximum of ¾ capacity to help the flow of cold air and prevent pockets of heat. Just place your extras in the freezer!
Rescue Food by Freezing It
The freezer can press the ‘pause’ button on a lot of foods while helping us maintain a good ¾ capacity in our fridge. And, you’d probably be surprised at just how much fresh produce can live a long life in the freezer before being thawed out for the family feast.
When we talk about doing OurPart™ in this food rescue project, we want to make sure that food isn’t going to waste because we’ve passed the “best before” date. So, if you have some produce in your fridge that you don’t believe you’ll be able to get on the dinner plate before its “best before” date, pop it in the freezer!
Ingredients you can freeze that might surprise you:
Fruit and Vegetables
Vegetables
Take your vegetables and pre-dice them. Then, place them into freezer bags so they don’t lose their moisture to the freezer or other frozen foods.
Bananas
Bananas can be frozen like many other fruits you love. A tip is to peel the banana and freeze it in a bag before blending frozen for a smoothie!
Berries
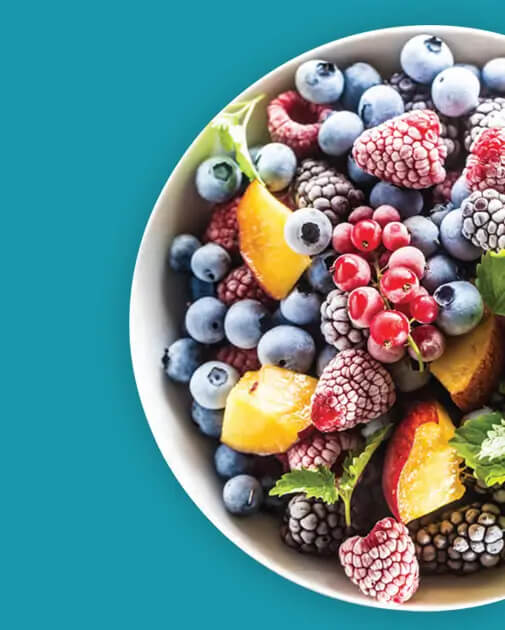
Berries can stick together as they freeze. So, try partially freezing them spaced on parchment paper before they go into an airtight tub.
Corn
Put corn straight into the freezer as-is. Then, microwave one ear for 4 minutes or two for 5 minutes as the silk will insulate and protect your corn as it cooks!
Mashed Potatoes
Portion out your mash on baking paper and freeze before placing into bags. Defrost your mash overnight in the fridge. It’ll last for two months!
Tomato Paste
With recipes only ever needing a tablespoon, portion it out into small freezer bags and place into the freezer. Then, just break off what you need.
Fruit and Vegetables
Grain-Based Produce
Pasta
Cooked pasta is a great thing to freeze and thaw in bulk or you-sized portions. Simply place it into a freezer container, making sure it has a lid, and then reheat in a hot water bath to make sure it isn’t too crisp and dry on leftovers night!
Cheese
You can’t freeze, thaw, and re-freeze cheeses. So, if you’re looking to snack, pre-cut your cheese into portions and bag them up before freezing. Quick tip: hard cheese freezes better than soft cheese.
Milk
This one might be a surprise but as long as your milk is in a plastic jug, you’re good to freeze! The carton allows for expansion, but do make sure it’s not already been opened. Then, when thawed, give it a good shake to remove any pieces of ice.
Proteins
Meats
All raw and pre-cooked meats can be safely frozen and thawed before cooking into a delicious family feast. But, a great tip is to freeze your meat in bags with the marinade. When your meat is thawed, it’s automatically marinaded!
Eggs
Instead of freezing eggs whole, shell and all, it’s best to crack them open and place them into freezer bags or even an ice cube tray. Then, when you’re ready to thaw, place them in the fridge and use away.
Freezing your leftovers is more than food-smart: it’s pocket-smart and environment-smart, too.
The average Canadian household spends $1,766 on food that is wasted every year.
– Waste Reduction Week in Canada
All this food simply goes to landfill and produces gas 25 times more damaging than carbon dioxide. Yet, 32% of this could go to communities across Canada that experience food insecurity. So, being able to freeze your food instead of allowing it to go to landfill brings us all that one step closer to a greener and more desired future.
That said, we still have a number of freezing tips for you to store away. From pre-freezing (yes, that’s a thing!) all the way to re-freezing, most techniques can be applied to any fresh produce. But, just read the packaging as some types of foods will have specific handling requirements to get the best results after thawing!
Become a freezer pro with these top tips:
1. Pre-Freezing
Pre-freezing doesn’t mean placing your foods in for a short freeze before pausing and placing them back into the Winter Wonderland of your kitchen for their full freeze. It’s all about preparation so you know you’re making the most of your food rescue project.
- Don’t fully cook foods (apart from meat and fish) if you plan to freeze them. Then, the reheating process can cook your food to perfection.
- Be sure to place your leftovers in the freezer within 2 days. Then, make sure you eat them within 2 days of thawing.
- Let hot foods cool before placing them in the freezer. Otherwise, you could risk raising the temperature of your freezer or cracking glassware!
- Separate your meats into portions before freezing to reduce the ice crystals. This will help keep the quality high for dinner time.
- Be sure to place all produce from your home harvest into airtight containers. This will prevent moisture loss and freezer burn!
- A great tip is to write the date you freeze your food on your freezer bags, tubs, and other containers. Then, you’ve got a good idea on freeze time.
- Plastic and glass containers are your freezer’s best friends. So, leave the foil and cardboard on the counter for another use!
- Leave the flavours until after thawing. This is because seasonings like salt can often speed up fat rancidity processes (not a good thing).
2. Freezing
Preventing food waste also means being sure your freezer is working optimally. From being the right temperature to preventing pockets of air from forming between foods, these tips can even be used as a checklist:
- The optimal temperature for your freezer is 18°C (0°F) or cooler. This makes sure all foods are safely frozen in time!
- Don’t add warm items into the freezer. This causes fluctuations in temperature that lead to ice crystals and freezer burn.
- Begin freezing foods spaced apart on a tray so they don’t stick together. Once frozen, however, feel free to batch them together to save space.
- For speedy freezing, you’ll want to rescue produce by storing it closest to the cold evaporator (often at the back, the top, or the side walls).
- If there isn’t a fast freezing option on your fridge-freezer, just temporarily lower the temperature on the freezer for a quicker food rescue!
- Vacuum pack your foods with a machine or freezer bag and straw, as air pockets can affect the colour, flavour, and texture of your food.
3. Thawing, Use, and Re-Freezing
Thawing is a careful process. Some foods need a water bath, some need the fridge for a slow thaw into a new temperature, and others can be left on the kitchen counter. But, knowing the tips of the thawing trade can really help us in our food rescue project and ensure all food thawed is a dish served deliciously.
- Freezing really does pause food maturity. But once it’s thawed, there’s a timer before it spoils, so be sure to meal plan before you thaw and enjoy.
- Best practices say that foods should thaw in your fridge at a slow rate to prevent bacteria growth. This is especially true with meats and proteins!
- Thaw your meat and fish in storage containers at the bottom of the fridge to avoid leakage and cross-contamination.
- With fruit and vegetables stored in freezer bags, you can thaw them out in a cold water bath. But be sure to change the water every 30 minutes!
- Only use a microwave to defrost if you’re going to eat it immediately. This is because microwaves cook unevenly and promote bacterial growth.
- If you’ve got frozen baked goods, thaw them out at room temperature as your fridge can actually speed up the staling process.
- When you thaw food correctly, you ensure the cooking process sufficiently heats and kills harmful bacteria. So, be sure to thaw responsibly!
- If you’ve frozen and thawed raw produce in your at-home food rescue project, you can cook and re-freeze once more!
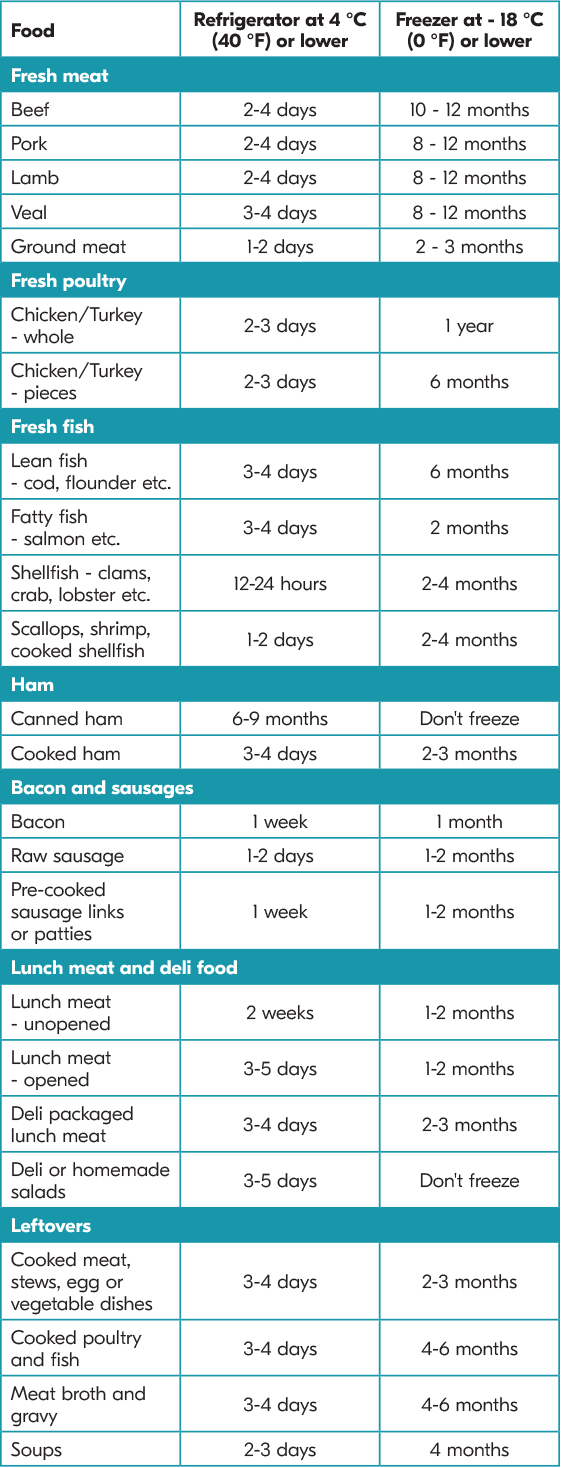
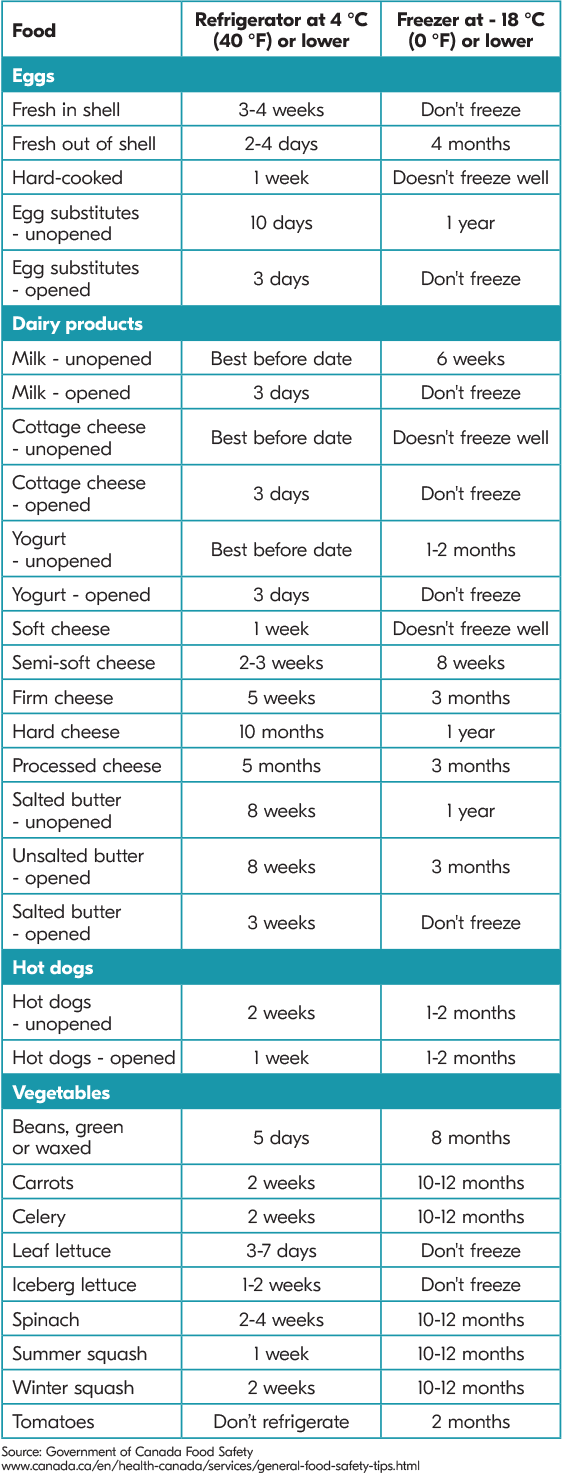
Your guide to fridge and freezer storage:
FRIDGE AND FREEZER STORAGE
The following recommended refrigeration times are for safety, and the freezing time are for quality. if you store properly wrapped food in your freezer, the quality may be maintained for a longer period of time.
Rescue Food by Canning It
Preserves are called preserves for a reason and that’s because effectively canning your fruit and vegetables in airtight jars can keep foods edible for around a year! And it doesn’t have to be daunting, either.
There are two methods you can choose from to prevent food waste at home; the first involves a pressure canning machine and the other only needs a water bath. The method you choose depends on the acidity of the food you’re rescuing…
Method 1: Water-Bath Canning
The water-bath method is the method you’ll want to use when canning highly acidic foods like fruit and pickles.
The reason a water-bath is great for high-acid foods is that, while boiling water heats produce to 100°C (212°F), the acid prevents yeasts, moulds, and harmful bacteria from growing. The biggest concern with canned food is botulism bacteria, so be sure you’re using the right method for the right foods!
Step 1:
Prepare the water-bath by adding a cooling rack or tied-together jar lids to the bottom of the pot to prevent the jars from touching it. Then, top-up the water level to make sure the jars are covered by at least an inch.
Step 2:
The next step is to bring the water to a boil. You’ll want to cover the pot with a lid to prevent the water from evaporating. Then, check the recipe to know how long to set your timer for. This can be anywhere from 5 to 10 minutes.
Step 3:
When the timer rings, turn off the heat, remove the lid, and leave to cool for 5 minutes. When ready, carefully remove the jars and place them on a cooling rack for at least 12 hours. Finally, check the seal by pressing your finger on the lid. A well-sealed jar will not have a lid that moves or comes off!
Method 2: Pressure Canner Canning
Using a pressure canner for the canning of your home harvest is best when your produce has a low acidity value such as vegetables, meat, and fish.
However, it’s worth knowing that high-acid foods that are paired with low-acid foods such as vinegar or lemon juice, make it a low-acid food. Other mixtures that are classed as low-acid include spaghetti sauce with meat and other vegetables.
The importance of using a pressure canner for low-acid foods comes from it requiring a much higher heat only reached by a pressure canner to kill yeasts, moulds, and botulism bacteria!
Step 1:
Just like with the water-bath, you need to prepare your pressure canner by adding a cooling rack to the bottom so the jars don’t come into contact with it.
Step 2:
After lowering your jars into the pressure canner, you can add enough water to cover by around an inch. Then, place the lid on top and set the canner dial to reach the pressure as noted in your recipe.
Step 3:
When your pressure canner has reached the optimal pressure, turn off the heat and allow the canner to cool naturally. You’ll know when it’s ready to pop the lid as the vent pops first! Finally, open carefully, place onto a cooling rack, leave for 12 hours, and do the finger press check.
Top Tips for Canning the Home Harvest:
Clean Your Jars
Step 1 is always to make sure the jars and cans you’ll be using for at-home food rescue are clean and sterilized. Of course, the same goes for your hands and other utensils you’ll use in the canning process. So, to avoid food waste through spoilage, use hot soapy water and inspect for cracks, nicks, or uneven rims.
Heat Your Jars
Heating your jars has two purposes. Not only will you be expanding the glass, but you’ll also be sterilizing your jars even more to prevent harmful bacterial growth. To do this, you’ll want to get a pot and place it on the hob; then, fill your pot and the jars with water and allow them to simmer for a couple of minutes.
Prep Your Closures
Now it’s time to focus on your lids. Place them flat-side-down into a sieve and into a pot of water. Let the water simmer and keep them warm right until the time they’re ready to use. Note: it’s important you don’t reuse your jar lids as the seal won’t be as effective for the next round of food rescue canning!
Prepare Your Recipe
Now your jars are ready for use, you can focus on the fun bit; cooking! Whether you’ve got an at-home harvest of fruits for the best breakfast preserve or something else altogether, enjoy this part and follow the recipe very carefully! Plus, if it’ll take more than half an hour, wait before beginning steps 1 to 3.
Fill Your Jars
Take this step one jar at a time. Place a jar on a heat-proof surface, insert the funnel, and ladle in your preserve. Be sure to leave the recipe-stated headroom (usually ½ an inch) and use a wooden utensil to remove air bubbles. Then, wipe the rim and threads of the jar before screwing the lid to fingertip tightness!
Check for Spoilage
Finally, when you go to open a jar and enjoy your delicious food rescue project, examine it closely. You’ll want to look out for bulges, cracks, spurting liquid, bad odours, colour changes, or a strange slipperiness. If you find any of these indications, it’s important you dispose of the preserve and don’t taste it!
Rescue Food by Portioning It
Portioning can be a difficult one, especially when our eyes are bigger than our stomachs! Plus, there’s the matter of knowing how much to portion out for different foods. For example, grain-based produce like rice and pasta can change in size and weight in the cooking process, making it tricky to judge when portioning out.
Luckily, there’s a handy guide to figuring out how to portion.
Proteins
Opt for meats and fish around the size and thickness of your flat palm.
Carbohydrates
Your carbohydrates should be around the size of your clenched fist.
Vegetables
Help yourself to two cupped handfuls of your salad and veggies.
Fats
Look at the size of your thumb for a healthy portion of cheese and sauce.
While it can be fun to measure out protions with our handy guide, we also know it can be useful to have some more details about measurements and weights for specific foodie-picks like rice, pasta, and oats. So, we’ve portioned out just how much you’ll need if you’re cooking for one, two, four, or even a party of six!
These foods are very often wasted after cooking and instead could live longer in the pantry or be redistributed to communities facing food insecurity across Canada. But, if there is a little leftover in the pan, be sure to look at our tips for food rescue in the freezer. This way, you can have leftovers another day!
Grains for 1
Cooking for one can be tricky and you probably find yourself accumulating leftovers in your fridge that go uneaten. Knowing how to correctly portion out food for one person can help solve this.
- Rice: ⅓ cup
- Pasta: 100g
- Oats: ½ cup
Grains for 2
Cooking for two can be fun, exciting, and daunting all at the same time. But, it doesn’t need to be complicated when it comes to portioning. So, follow the measurements below and your food adventures for two will go more smoothly than you might think.
- Rice: ⅔ cup
- Pasta: 200g
- Oats: 1 cup
Grains for 4
Dining for four can be as simple as dining for two, twice. If you know your portions for two people, simply double the numbers. Even if you overcook, don’t forget the freezer can put a pause on your leftovers!
- Rice: 1 ⅓ cup
- Pasta: 400g
- Oats: 2 cups
Grains for 6
Finally, if you’ve got a get-together coming up or you’re cooking for the whole family we’ve got just the portion sizes for you. Here is how to measure out grains for 6 people.
- Rice: 2 cups
- Pasta: 600g
- Oats: 3 cups
Rescue Food by Storing It
Storing your foods correctly can be the difference between having bananas ripen too quickly and having them last until snack time. It’s important to know the storage tips of the food trade to make sure you’re making the most out of your grocery shop. Whether that’s making use of the pantry, the counter, the fridge, or the freezer. This way, there’s nothing unnecessarily heading into the trash at the end of the week!
The first tip is to have a rotation in your storage pantry, cupboards, and fridge to make sure you’ve got all the “eat me first” ingredients at the front!
The next food-rescue tips are all ingredient-based, so here are 21 more stored for you to eat away at:
Apples
Apples are highly acidic and emit ethylene gas that makes them ripen and sour very quickly. So, to save you from a bad apple, it’s best to store your golden delicious and ruby reds in the fridge. If you have a low-humidity draw in your fridge, place them in here for best results!
Avocados
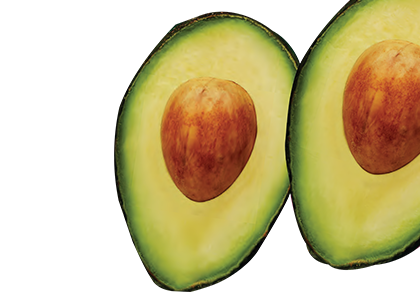
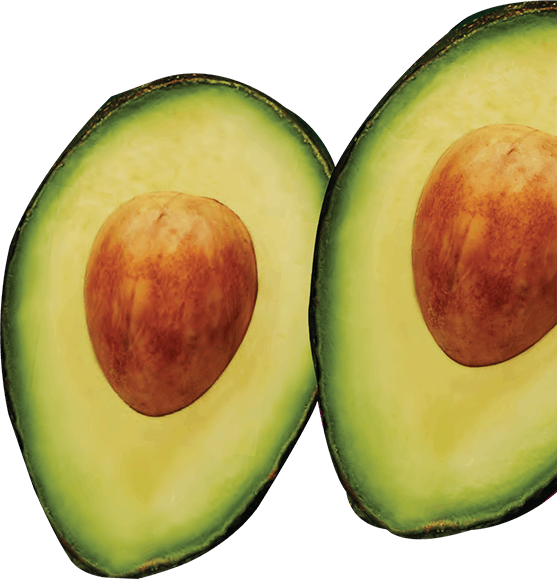
If they’re whole, you can leave your avocados to ripen at room temperature before placing them in the fridge. But, if they’ve already been cut open, you’ll want to keep the seed and place them in the fridge tightly wrapped or air-sealed. To freeze them, mash first and add a squeeze of lemon juice before freezing in an ice cube tray for quick avo-access.
Bananas
Bananas are just like apples with their ethylene gas. But it’s not just themselves they affect: it’s everything around them, too! So, store your bananas out of the fridge and in an open space away from other produce to make sure there’s no premature ripening or food waste. Plus, if left in the fridge, they’ll make everything taste like bananas!
Bread
Bread is a funny one; while it’s quite the debate from kitchen to kitchen, the fridge and freezer are the perfect storage locations to keep your bread fresh for as long as possible. If your household doesn’t eat a loaf within a few days, it’s worth knowing you can toast bread directly from the freezer!
Broccoli
Broccoli should be placed within a small plastic bag and in the high humidity draw of your fridge if you’re going to be eating it within a couple of days. For longer storage, you can keep your broccoli fresh and delicious by wrapping it in a damp paper towel before placing it in the plastic bag. Also, you can freeze broccoli by detaching the florets and spacing them out on a lined tray.
Carrots
Wrap up your carrots in a paper towel (to stop them from going limp) and place them in a resealable bag. Then, you can store in the fridge or freezer for a healthy long life. If your carrots are already limp, simply revive them in a water bath for a minute or so. But if you see black or slime, it’s time for the compost!
Cheese
Cheese needs to stay cool to thrive, meaning your refrigerator’s middle shelf is the best spot. Simply store wrapped in its original packaging (even after opening) and wrap once in something else. This something else could be cheesecloth, beeswax paper, cling film, or simply a resealable plastic bag.
Corn
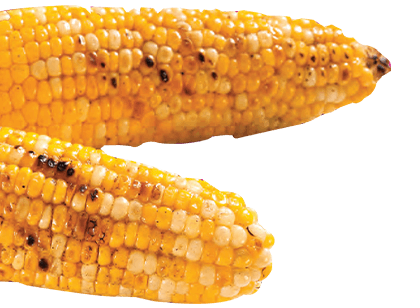
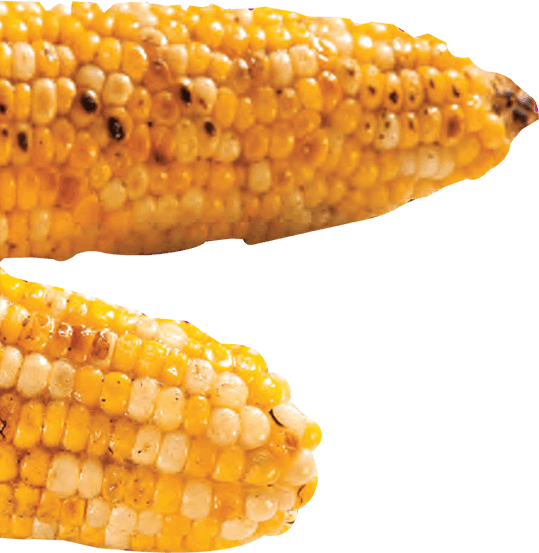
Corn, no matter where you choose to store it, should be left with the husk and all right until the moment you decide to put it on the menu. Your fridge’s low humidity draw is perfect for keeping your corn fresh for longer but so is your freezer. Plus, you can microwave and ear for 4 minutes straight from the freezer as the husk silks protect it.
Cucumbers
If your cucumber has been bought in a plastic sleeve, it’s best to leave it on. This way, it can protect the soft outside of the cucumber while preventing it from dehydrating. Otherwise, you can choose to store your cucumber at room temperature or in the fridge (but the fridge does add a couple of extra days on!).
Eggplant
Unlike with most other fruits, vegetables, and fresh produce, eggplant is a rare food item that doesn’t fare well in the fridge. When stored in the fridge, it can lose its flavour and begin to brown. So, the best tip is to find somewhere dry and cool to store your eggplant (just not the fridge).
Lemons and Limes
As lemon and lime are in the same family, they follow the same storage rules. If you know you’ll use your lemons and limes within the week, they’re safely stored in the fruit bowl. Otherwise, storing as they come in the fridge or the freezer is the place for them! A top tip is to juice your lemons and limes and freeze the juice in an ice cube tray for a refreshing drink!
Nuts and Seeds
Every nut, every seed, and every legume stores differently from the last because of their varied contents of unsaturated fats. So, it’s best to always check the packaging. But, a good rule of thumb is to minimize their exposure to light, store in the fridge or freezer for a longer life, and simply pan-heat when needed.
Onions
Unless you’re looking to grow something in your back garden, keep potatoes and onions away from each other (they encourage sprouting!). Otherwise, store full onions in a dark and dry place while your cut and peeled onions can be rescued in an airtight container in the fridge.
Oranges
Oranges have two homes in your kitchen. The first is to store for long periods; let your oranges, satsumas, clementines, and other orange fruits thrive in your fridge. Then, when you’re ready for a citrus snack, take them out and place them in a fruit bowl as they come to room temperature.
Potatoes
Store potatoes on their own in a dark, dry place. Unwashed potatoes last that little bit longer, so don’t wash until you’re ready for your meal. As for sprouting potatoes, they’re still safe and delicious meaning your food rescue project can be to de-sprout and dine. Although, large green areas can indicate a toxin and they’re best discarded after that!
Pumpkins
Interestingly, whole pumpkins last best when stored stem-side-down in a cool and dry place on a mat. This way they can still be pumpkin-y for another 3 to 4 months. But, if you have cut pumpkin, you’ll want to wrap it tightly in cling film (or remove the seeds and wrap it in beeswax paper) before storing it in the fridge.
Rice
Uncooked white rice should never be a story of food waste as it can last indefinitely. Brown rice, however, needs eating within 12 months due to the oils in the outer hull. Cooked rice, on the other hand, should be stored in the fridge and eaten within a couple of days, or frozen and eaten within a couple of months.
Salad Greens
For greens like lettuce, they’re best stored wrapped in paper towel in your fridge’s crisper so the moisture doesn’t cause it to wilt. Otherwise, you’ll have to place it in ice water for a couple of minutes to revive it. For other greens like baby leaf spinach, rocket, or mesclun, take them out of their packages and place them in the fridge in an airtight container.
Stone Fruit
Fruits with a centre stone such as peaches, mangoes, cherries, plums, and others are just like avocados. Leave them to ripen at room temperature and then transfer to the fridge or freezer once ripened.
Tomatoes
Tomatoes, unlike other fruits, are best stored outside of the fridge. Even though they can have their time in the freezer when pureed, fresh tomatoes are best saved from food waste by sitting at room temperature. However, as soon as they’ve gone soft, it’s time to make a meal or puree the tomato for freezing!
Yogurt
If your refrigerator is set at 4°C (39.2°F) or lower, you can store your yogurt and keep it edible for 7 to 14 days. Any longer and the yogurt can spoil with bacteria and yeast growth. But, for best results, store your yogurt in its original container in the fridge. While it might have a slight watery layer at the top, it’s the natural separation process after being stored for a couple of days. Just stir and enjoy!
Rescue Food by Dehydrating It
If you have your own fruit growing in your garden, the best thing you can do is make use of the home harvest and dehydrate all your nutritious and organic produce. This will prevent unnecessary food loss, reduce the methane gas being released, and save your pocket, too.
But it’s all about being prepared and having the know-how. From the months best to dehydrate specific produce to the method you choose to use, there are four steps to dehydrating you should know:
-
Choosing Your Produce
Starting at the beginning, you’ll want to choose produce that is ripe or just past ripe while cutting away any blemishes. Knowing that, here are the best months for you to dehydrate your fruit and vegetables.
March
- Apples
- Kiwis
- Peppers
April
- Apples
- Peppers
- Tomatoes
May
- Apples
- Peas
- Peppers
- Tomatoes
June
- Blueberries
- Broccoli
- Carrots
- Cauliflower
- Cherries
- Peas
- Peppers
- Strawberries
- Tomatoes
- Zucchini
July
- Apricots
- Beans
- Blackberries
- Broccoli
- Cherries
- Corn
- Currants
- Nectarines
- Peppers
- Raspberries
- Zucchini
August
- Apricots
- Blueberries
- Cherries
- Corn
- Garlic
- Melon
- Nectarines
- Peaches
- Pears
- Plums
- Strawberries
September
- Apples
- Beans
- Broccoli
- Corn
- Cranberries
- Grapes
- Pears
- Plums
- Pumpkin
- Zucchini
October
- Apples
- Carrots
- Cranberries
- Kiwis
- Pears
- Peppers
- Quince
-
Preparing Your Produce
After choosing produce for your dehydrating food rescue project, it’s important to prepare it as much as you can. This means washing, de-pitting, drying, de-stemming, and more. Here are some top tips:
- Wash anything you’re going to dehydrate in cold water.
- Remove pits and stones but small seeds are ok as they affect how even the fruit leathers will dry.
- Remove thick skins by slicing the bottom of the fruit with an X, boiling for 30 seconds, and transferring to an ice bath.
- Cut your fruit and vegetables into thin and even slices from ⅛” to ¼” thick.
- Blanche vegetables like broccoli, carrot, potato, corn, cauliflower, and peas in boiling water for 2-3 minutes before transferring to an ice bath.
- Use 4 cups of water and ¼ cup of lemon juice to soak fruits prone to oxidization and discolouration for 10 minutes.
- Toss your fruit and vegetables with a sprinkle of seasoning like salt, spice, or sugar for a fuller flavour after dehydrating.
-
Drying Your Produce
When it comes to the drying process, itself, there are two methods to choose from. There’s using your oven for your at-home harvest and there’s using a dehydrator (which can be a little easier).
Oven Drying
The first few times you dehydrate with the oven will be a bit of a food rescue trialing period as you may overcook or undercook your produce.
When you undercook your produce, it will have remaining moisture which can cause the leathers to spoil. Overcooking, on the other hand, just means you’re likely to get a crispy texture rather than a chewy texture.
Here are some other tips:
- Turn your oven on to its lowest setting. This can be 54-71°C (130-160°F), 71°C (160°F), or 93°C (200°F) depending on your oven, and note that the higher the temperature, the more airflow you’ll need.
- Keep the oven door open so air can circulate and remove moisture.
- Add height and place your fruit and vegetable slices on a wire cooling rack on top of parchment paper so heat can get to both sides evenly.
- Rotate the racks of fruit every two hours front and back, side to side, and even flip them if your oven doesn’t get even heat.
- Your food rescue dehydration is complete when the pieces feel like leather!
Dehydrator Drying
Dehydrator drying is much like oven drying but a little easier and leaves your oven open to cooking the family meal at dinner time.
Your dehydrator might have a “fruit” setting; if it does, go ahead and use it. If it doesn’t, you’ll want to preset it to 60°C (140°F).
Otherwise, it follows many of the same rules as oven drying.
Here are some other tips to optimize your food rescue project with a dehydrator:
- Spread your slices of fruit and vegetables apart from each other on a single layer.
- The drying time will vary depending on the type of produce you’ve chosen, how thick each slice is, humidity levels, the water content of the produce, and even the altitude you’re dehydrating at!
- Check your leathers after 12 hours by taking a piece out and allowing it to cool. Then, check every 6 hours after that if it’s still not quite done.
- It’s better to be overcooked than it is to be undercooked!
- To know when they’re ready, they should feel dry and leathery after they’ve cooled.
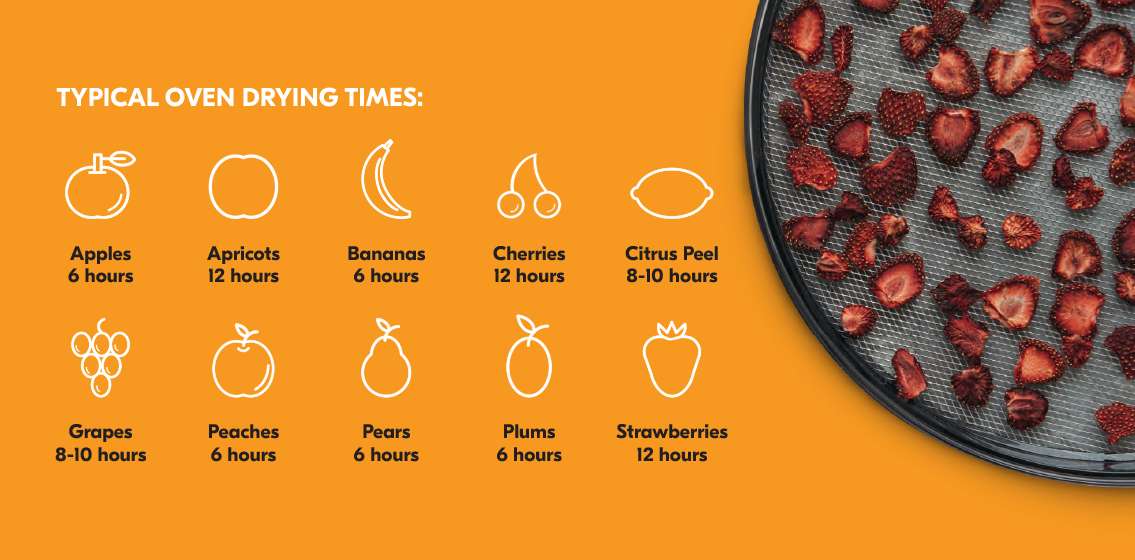
How long you should dehydrate your fruit and vegetables for:

-
Curing Your Produce
The final step of dehydrating the home harvest is the most important of all; curing. The curing process ensures there’s no leftover moisture in your fruit and vegetable leathers that could otherwise spoil and contribute to the very food waste we’re trying to avoid.
So, even if you believe you’ve overcooked your leathers, the final step is to always cure and store!
To cure, place your fruit and vegetables in an open container and allow to cool completely. You’ll need to leave them for around 4 to 5 days, shaking daily, just to let any remaining moisture evaporate.
When cured, you can enjoy your fruit vegetable leathers as a hearty snack, breakfast addition, or banquet bonanza with the family for 10 months! But, to avoid food waste, you’ll want to make sure they’re sealed in an airtight container.
